Friday, February 10, 2012

Red (less) Velvet Cake Cookies

While I have never been a chocolate person at all, I have always loved Red Velvet Cake. I think it is the slightly sour/sweet plus all that Cream Cheese Frosting... mmmmm! 
I have been messing around with Red Velvet Cake recipes for a while trying to get something together that I really like. I think I may finally have it! These turned out really yummy... not super sweet, but still yummy! This is a very cakey cookie, and has the sour of the traditional red velvet cake, without using dairy (traditionally it would be buttermilk). I hope you all enjoy! I hope to have a Dairy Free frosting coming up soon that could be paired with them!

*Also, if you want to buy the natural red food coloring that are available you could. I just chose not to because the flavor doesn't change, and I am not into adding unnecessary ingredients. If it were for a party or something it might be a nice addition.

Red (less) Velvet Cake Cookies
1 1/2 C Almond Flour
1 tsp Baking Powder
1 tsp Baking Soda
1/8 C Honey (could be increased if you wanted a sweeter product)
2 Eggs
1/2 C Coconut Milk
1 Tbsp White Vinegar

Preheat oven to 325. 
In a large bowl, combine dry ingredients. In a medium bowl, combine wet ingredients. Stir wet ingredients into dry and combine. 
Using a small ice cream style scoop, scoop cookies onto silpat mat (or parchment paper) lined baking sheets. 
This made 16 decent sized cookies. Place in preheated oven and allow to cook for 15-20 minutes or until cooked through. Once removed, transfer to wire cooling racks and enjoy!

Friday, February 3, 2012

Part 1: Grocery Store Free


Here we go!

To start off with, I am just as excited, if not more, about the response I have had to this challenge than I am about actually doing it. I have already had 4 people tell me they signed up for a local CSA in their area, and a couple more say they were looking into it! Think of the impact on local farmers if more of us started buying local, sustainable! 

We are off and running on our No Grocery Store Challenge for the month of February. I am already amazed at some of the options that existed right under my nose that I never realized. So I will start with this week, what I have purchased and what I still plan to purchase.


1)     Eggs- I found a source for local, soy-free eggs for $3/dozen. It is a local family who has a small working farm and is selling the extra eggs they get. They are located a couple miles from my church, so I have set up with them to pick up on Sundays after service on my way home. Additionally, I found another source, a little further from me (still within 10 miles) for $3/dozen as well that I can use if I don’t get enough from my first source.
Look at Craigslist or other local selling sites to find small, local sources for eggs. You may be surprised what you find!


2)    Milk-  Blackjack Valley Farms, Fresh Breeze Organic
a)      Raw- I use raw milk for making yogurt and ricotta. I had a bad experience with a close friend of my family using raw milk. It resulted in a 3 year old girl ending up in the hospital and the entire family very very sick. Because of this I do not give my kids raw milk products that I do not bring to temperature on my own. I do use it for making homemade yogurt and cheese.

b)      Pasteurized- My kids drink a glass of milk a day, so I purchase organic Pasteurized milk through my CSA provider, Full Circle Farms.
3)     Produce- Full Circle Farms. I like that I can choose what produce I want each week, and have the option of using their ‘Green Grocer’ to get additional local organic things. This includes the milk I mentioned earlier, and much more. During the summer, when farmers markets are open, I can cut my box down smaller. During the winter I can purchase a larger box for our produce needs.


4)     Beef- Purchased 100lbs locally a couple months back. Check out Craigslist for local, small farmers who are selling in your area. I looked today and was amazed at the number of GF Beef available around me, for very decent prices!


5)     Bison- Purchased 48lbs from Tropical Traditions last month that will last.  You can hear more about their bison here. You can purchase your own HERE.


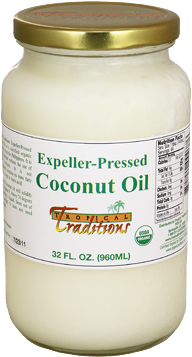
6)      Coconut Oil- Tropical Traditions. I am pretty stocked from sales the past couple months, so I don’t foresee needing more anytime soon. But if I do, it will be from them. Hands down, they have the best coconut products!


7)      Honey- my husband eats some raw honey every day. I know a lot of Paleo purists would frown on this, but here is the deal. By doing this, my husband has completely removed the at one time daily, high dose allergy medication. He no longer wakes up with a headache and congestion, or walks around in a allergy med daze (yes, even Claritin had that effect). For us it is a no brainer! 
     I purchased a large container from a local source at the farmers market, and now that I am out and between Farmers Market Season I have purchased some from Tropical Traditions. This stuff has the best flavor, according to him. You can check it out HERE. I found 2 local options (again on Craigslist) that I will be checking into when I run out of the stuff I have. 


8)     Maple Syrup- My parents still live in Western NY, where I grew up. They have access to the best pure maple syrup at a great price. My mom is gracious enough to send it to us when we need it! (Love those ‘if it fits, it ships’ boxes)!


So all in all, things are going well. I am excited to have found new sources, and more to look more into over the next week.

My next challenge: I will need to find Chicken soon as I am down to my last bag in the freezer. Anyone have experience with purchasing quality chicken meat locally, or have suggestions or leads?

Here is a bit on my spending so far and some planned expenses:
Prior:
Local GF Beef (purchased 100lbs at $5/lb)

Prior:
GF Bison from Tropical Traditions (Purchased 48lb @$6/lb)

1/30/12
Full Circle Farms- Produce
$36.19
2/1/12
BlackJack Farms- Raw Milk ($7/Gallon)
$7
2/5/12
Eggs ($3/dozen)
$9


Chicken Wing Jerky

Go Giants!!
This is a revision of my Bison Jerky, just in time for the Superbowl!


Chicken Wing Jerky
2 lb Ground Chicken (not breast, you want the fattier one)
3 Tbsp Butter-melted 
3 Tbsp Onion Powder
1/4 tsp Salt
1/2 C Franks Red Hot

Combine all ingredients in the food processor.

Turn it on and let it go till everything is evenly distributed and broken down.

 Place in the refrigerator for several hours to allow the flavors to meld.  When ready to begin, preheat oven to 170.  Spread about 1/3 of the mixture on a full size, raised edge baking sheet.

With the back of a spatula, spread mixture as thin as you can 1/4-1/8in.
 The 2 pounds is enough for 2-3 baking sheets full. Place in the oven for about 2 hours. Flip jerky over and return to oven for an additional 2 hours or until the consistency you want is achieved. 


Remove from oven and allow it to cool. Use kitchen sheers to cut into strips.

Tuesday, January 31, 2012

Bison Steak-Burger with Green Chard and Mushroom Topping


Bison Steak-Burger with Green Chard and Mushroom Topping
Burger:
 1 lb Ground Bison
 2 Tbsp Onion Powder
 1 Tbsp Trader Joe's 21 Seasoning Salute
 1/4 tsp Salt

Topping:
 4 Tbsp GF Butter
 1 Bunch Green Chard
 1/2 lb Mushroom
 2 Tbsp Onion Powder
 1/4 tsp salt
 1 C Chicken Stock or Water

In a large bowl, mix burger ingredients. Allow the meat to sit while you prep the topping ingredients to allow the flavors to meld.


Slice the mushrooms and green chard.
 In a large pan, melt the butter.  Add in the sliced veggies, onion powder and salt.
Allow the veggies to cook down for about 5 minutes.

While the sauce is cooking, form the burgers into 2- 8oz burgers.
Begin cooking the steak burgers in a large pan with a bit of melted butter.

Add stock to the veggie mixture and allow it to reduce by about 1/2.  Flip burgers and continue to cook to your desired temperature. We cooked ours to medium-well.


Once burger is cooked and topping is reduced, plate burger and top.
Make sure you get some of the buttery sauce on there.
 Enjoy!

Tuesday, January 24, 2012

Bison (Ground Meat) Jerky

Making your own jerky is a great way to cut cost, as well as ensuring you are eating a clean product. Most jerky products on the market are filled with sugars, preservative and tons of salt! By making your own you not only control those, but the quality of the meat used.
An additional cost cutting measure is to use ground meat. Often, Grass fed Ground Meat is less expensive than other cuts.  I got this Grass Fed Ground Bison for $6/lb, making the entire batch (which came out to 1 pound dried, though we ate about 1/2 a sheet pan before I got the picture) for $12. That is incredible for completely clean, Grass fed, Bison Jerky! Try this with bison, or any other ground meat you like!

Bison Jerky
2 lb Ground Bison (or other meat)
1 Tbsp Coconut Aminos
1 tsp Salt
1 Tbsp Molasses
1 tsp Red Pepper Flakes

Place all ingredients in a food processor.
Turn it on and let it go till everything is evenly distributed and broken down.
 Place in the refrigerator for several hours to allow the flavors to meld.  When ready to begin, preheat oven to 170.  Spread about 1/3 of the mixture on a full size, raised edge baking sheet.
With the back of a spatula, spread mixture as thin as you can 1/4-1/8in.
 The 2 pounds is enough for 3 baking sheets full. Place in the oven for about 3 hours or until the consistency is what you want.
Remove from oven and allow it to cool. Use kitchen sheers to cut into strips.
 Enjoy!

Friday, January 20, 2012

Goodbye Grocery Store!


Are you going to go to the grocery store next month? Guess what, I’m not. Yeah, you read that right!


Though I have steered away from processed foods for some time, having made my own breads, baked goods and treats from scratch even prior to giving up grains and sugars, my perspective on food has changed drastically.  Though I am still very budget conscious, my perspective on frugal has shifted; I would rather buy less of a quality item and find ways to stretch it than a larger amount of a low quality item.

After doing a lot of talking, my husband and I have made the decision that we are not going to go to the grocery store for a month. We already find local, high quality sources for much of what we buy, and we want to challenge ourselves to find more. Granted, right now, in the dead of winter might not be the best time to be starting this, but we will give it a go!

So here are the rules we have set forth for ourselves:
1)    We will NOT spend money in a grocery/big box/convenience store on anything we will eat. Paper goods, toiletries, etc will still be purchase when they are needed.

2) We will seek out local sources for what we can, and resort to outside source last. If we cannot find the quality we want locally we are willing to seek out online/shipped sources (Like this awesome deal at Tropical Traditions, or US Wellness Meats, or even Amazon if needed) that will provide us with what we need.

3)  We will stick to our Paleo/Primal tenants. For us this means: No Grains, No Processed Sugars, Limited High Quality Dairy, Limited Paleo Sweeteners (Honey/Maple Syrup/Dates/Figs) and Carbs in the moderation that our bodies thrive (Steven does better with a higher carb than me, and we will maintain those amounts).

Though we have the expectation that making this shift may increase the amount we spend on food a bit, we are hoping that the reduction of spur of the moment purchases will offset these. I won’t be buying the package of dried fruit to occupy the kids in the cart if they are never in the cart, right.

Knowing that this is a testing month we are giving ourselves a bit of wiggle room on the budget. I am going to buy the amounts that we need, and see how much that is. In other words, rather than trying to stick to a budget, I am going to allow our bodies to determine its needs. It will be a process of experimenting and learning, but I think it will be a good shift and bring us more insight.

With all this said, I will be spending the next week preparing by sourcing everything we will need. Though I won’t be starting for another week, I plan to do very limited grocery store shopping. Additionally, I will not buying ahead what I would be using. There is however one exception to that rule: 

I will be ‘stocking-up’ on butter before the challenge starts for a couple reasons. First, I love KerryGold Butter! I love the flavor and have yet to find one I like nearly as well! Secondly, the local pastured alternative is nearly 5 times more expensive. With as much as we use, that cost will add up very fast. For the sake of my wallet (and my taste buds) I will be buying a couple pounds ahead for the month, but I will not go into the grocery store during the month to buy any. Does that make sense?  

And of course, I will be taking you all along for the journey. I will update weekly on what I have purchased, from where, and the cost of my purchases. Though I don’t think I could go without the grocery store forever, I am really hoping that we gain insight into local products, as well as find a better way to fit the quality needs into the budget. So here we go!
What do you guys think? Are you up for the challenge? I would love for others to join and share insights as we work though this! 

Butternut Squash Fry Bread

This turned out so yummy! They are super buttery and fluffy! I could have easily eaten a couple of these, but they are definitely a moderation food for me as they do contain tapioca and almond flour. That being said, the kids (and hubby) ate them right up, so I will be making another batch tomorrow! I don't moderate my kids carbs as much as I do my own because, well, they are kids!! They are expelling a lot of energy growing, running, playing, and being wild everyday, so I don't limit their intake of quality ingredients! Additionally, my husband maintains a higher carb version of Paleo as well because he feels better on one, especially when he is working towards more strength specific goals physically.


Butternut Squash Fry Bread
1 C Butternut Puree
2 Eggs
1/4 C Coconut Flour
1/2 C Tapioca Flour
1 C Almond Flour
1 tsp Baking Powder
1/2 tsp Salt
1 Tbsp Onion Powder
Fresh Cracked Pepper
Butter for Cooking

In a small bowl combine the squash and eggs. In a large bowl, combine remaining ingredients (except butter). Add dry ingredients into wet and stir to combine.

Preheat a tbsp or so of butter in a heavy bottom pan on the stovetop over medium to medium high heat.

 Spoon 2 Tbsp or so of the batter into the preaheated pan and allow it to cook for about 2 minutes on the first side.
Flip the fry bread over and flatten it with the back of the spatula.
Allow the bread to cook an additional 2 minutes or so till nicely browned on both sides and cooked through.
Remove from pan and enjoy warm!

*Something to note: I have found butternut squash to have different consistency depending on how you cook it. The consistency you are looking for is a thick pancake batter, so you may need to adjust the ingredients a bit to get that.